26/05/17. Bits & Pieces

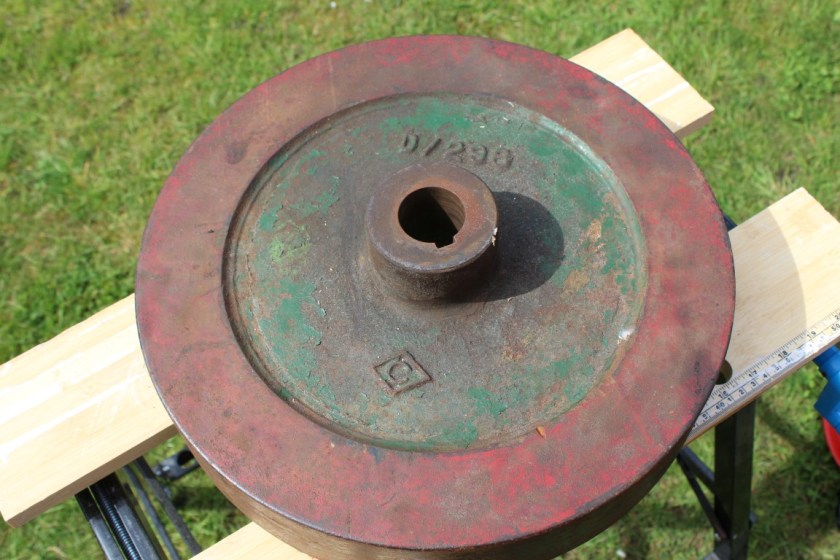
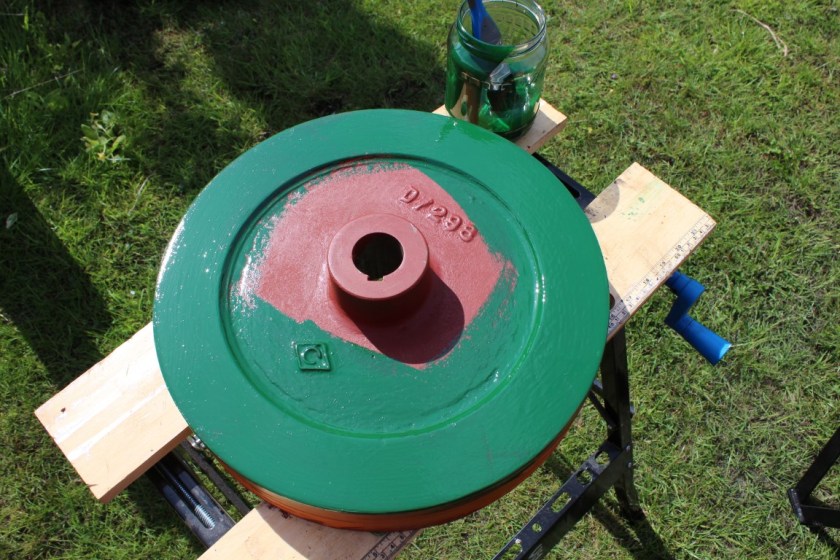
Apologies for not having posted anything recently. It’s not that things haven’t been going on, but I’ve not had the time to post any updates. Since I’ve last been here I’ve finished painting the flywheel and applied the direction arrow transfer.

IMG_6365 (Medium)

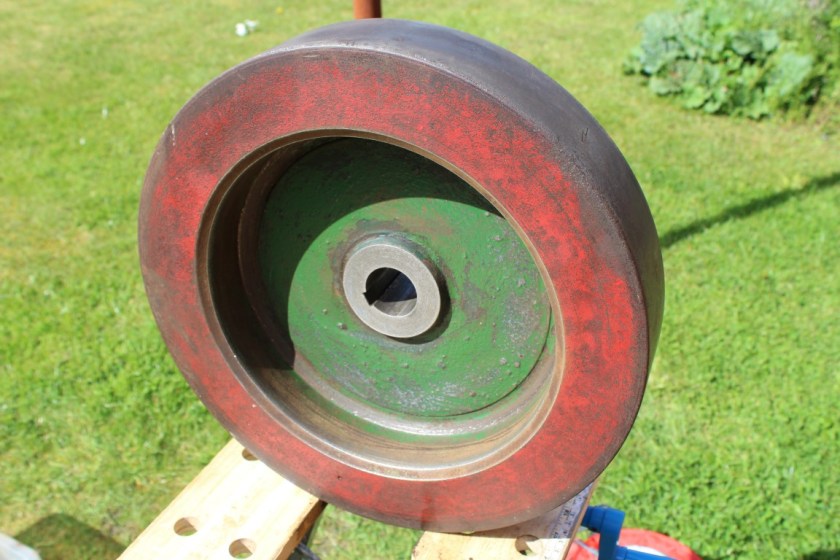
Newly painted flywheel with decal

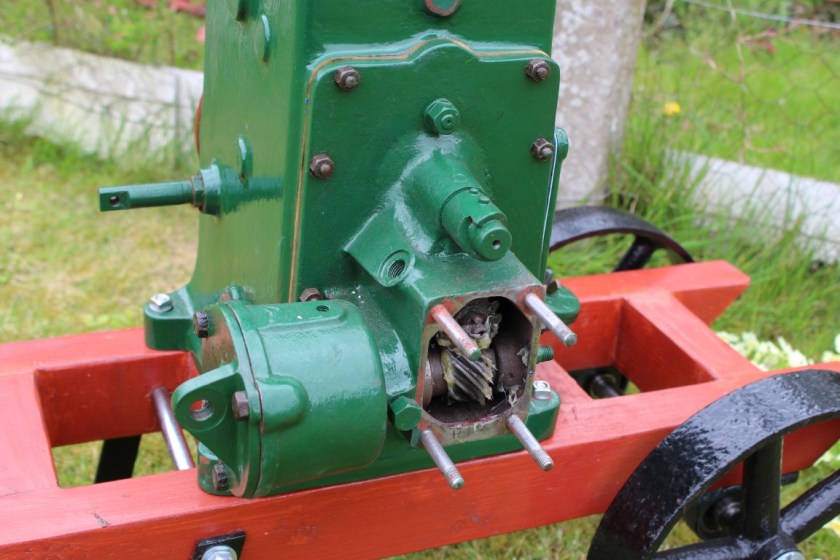
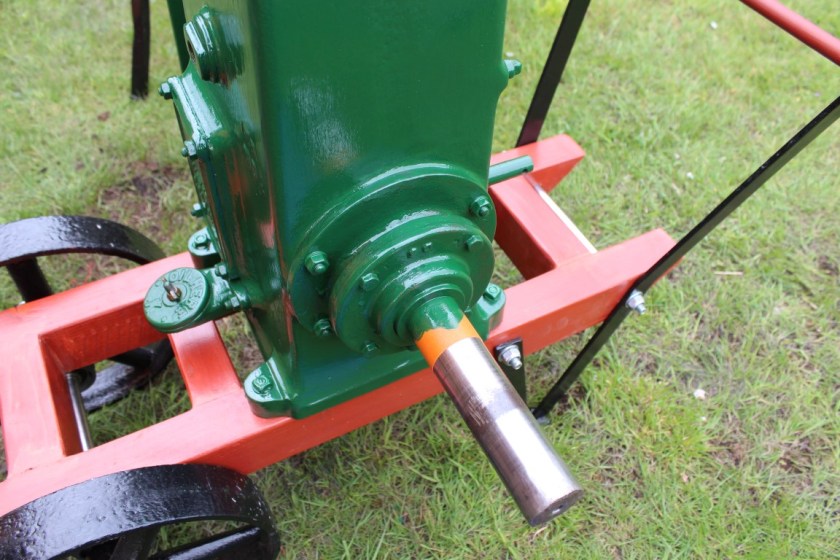
In addition to this, I have touched up the paint in various places on the engine block. I have also refurbished the carburettor and replaced one or two components to bring it up to a standard.

IMG_6341 (Medium)

The carburettor rubbed down and ready for paint

I have totally stripped the carb down and then given it a coat of paint to hopefully give it a new lease of life.

IMG_6362 (Medium)

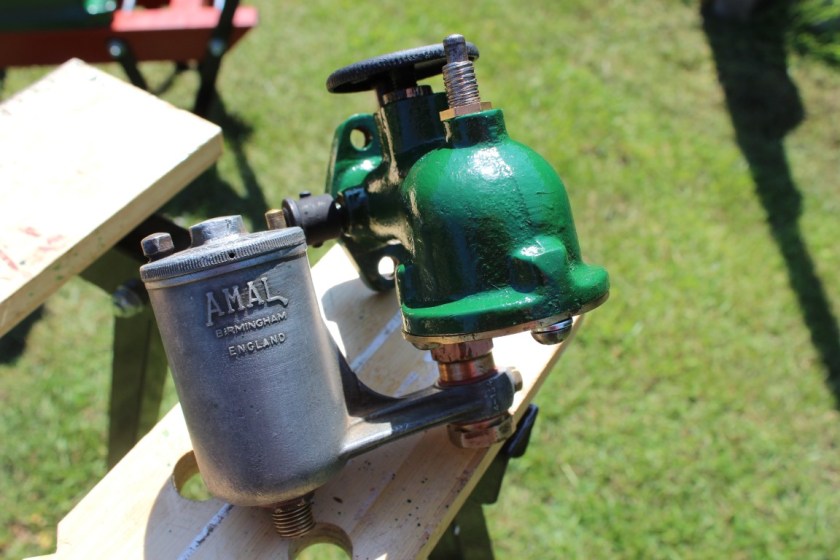
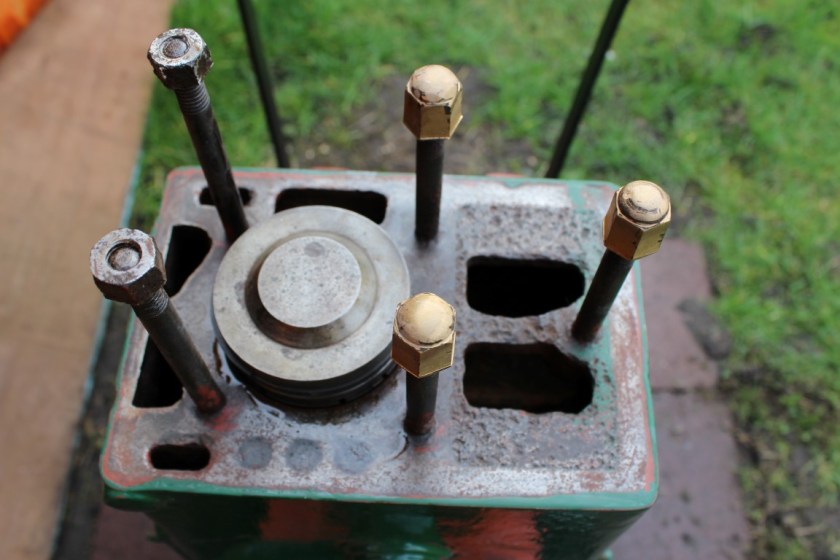
The refurbished carburettor…

IMG_6363 (Medium)

….and from above

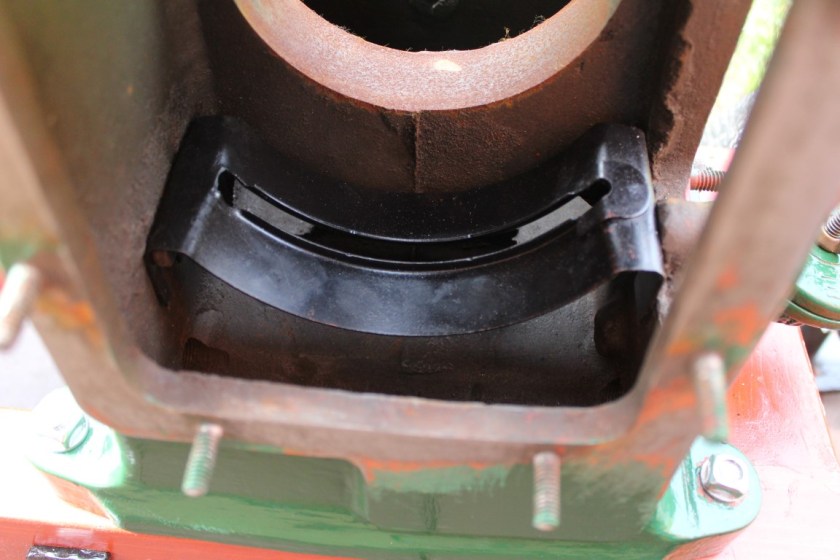
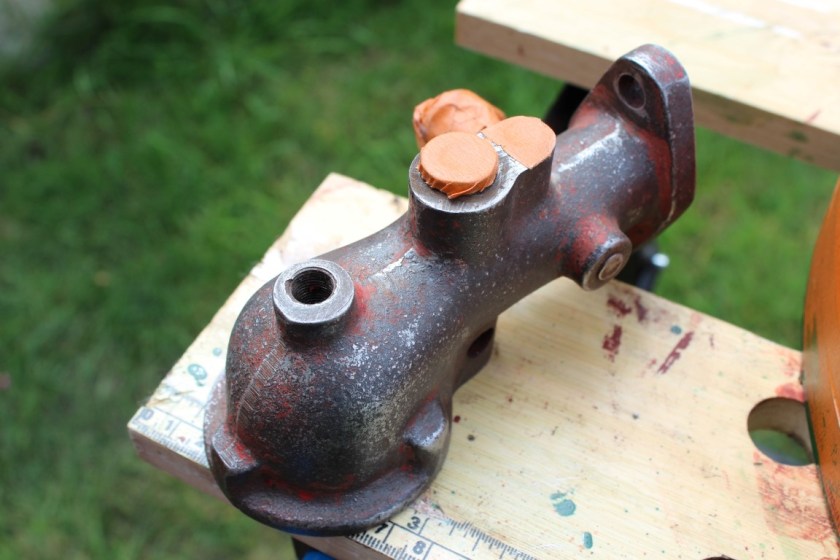
As well as the above I also had to pay attention to the cylinder head and engine block. There was a small amount of pitting and rust around the area where the water jacket meets the engine block. I decided to apply a small amount of Chemical Metal (Plastic Padding) filler to the affected areas. This is mainly to ensure a good seal when the cylinder head is fitted. I do not want any leaks!

IMG_6359 (Medium)

Filler applied to the engine block……

IMG_6360 (Medium)

….and the cylinder head

The filler will be sanded back flush with the block and the head. This will hopefully remove any concerns about leaks prior to fitting the cylinder head and the new gasket.

01/05/17. May Day

So it’s the May Bank Holiday (National holiday here in the UK), and despite the threat of rain, it actually stayed dry long enough for me to get some painting done. I had a go at the flywheel with an 80 grit flap disc in the grinder, to remove as much of the old paint as I could. The flywheel then had a coat of red oxide primer before getting onto applying some enamel paint today.

IMG_6337 (Medium)

It was the same process as before when applying the enamel paint. 90% Mid Brunswick Green to 10% thinners, to make it a little easier to apply. I had the crankshaft area on the engine that needed painting and one or two other places that needed touching up

IMG_6338 (Medium)

Both the flywheel and the crankshaft housing will need another coat of green, but I’ll have to give this a couple of days to dry first.

IMG_6339 (Medium)

23/04/17. Magneto bracket

Today I spent a few minutes fitting the magneto bracket back on to the timing case. A small paper gasket went on first. Next the magneto nut closest to the engine has to be put in place before attaching the bracket, as it is impossible to get in after it has been fitted.

You may also recall that I was missing a stud for the crankcase cover. I have since sourced one of these and I also fitted that today.

IMG_6336 (Medium)

New stud fitted for the crankcase cover

Short and sweet today, but it was a case of doing a couple of little jobs while I had the opportunity. The next thing to do is to finish cleaning up the flywheel, and then to prime and paint it, ready to go back on the crankshaft.

15/04/17. Flywheel Fun

Today I had a go at cleaning up the flywheel. It’ll need a rub down before I can paint it and as you would imagine, the reverse of the flywheel was caked in grease and dirt. I put it into a large plastic crate and poured over some paraffin, and then used a scrubbing brush and a scraper to remove all the muck before wiping it down with a cloth.

IMG_6324 (Medium)

A D/298 Spec Flywheel

This engine is 26DH specification, so it features the heavier 14″ flywheel, which having lifted it around quite a bit, is a fair old lump! As you can see in the photo, the outside edge was painted bright red, with the other parts painted green. As my engine was manufactured in WWII (1942) I’m not sure whether it would have had the “war finish” or not. I think this was a different, lighter shade of green, and possibly not as good a finish as normal, due to the constraints placed on supplies because of the war effort.

I don’t think the red paint was a standard Lister thing. I’m guessing this was a later addition, presumably to draw attention to the flywheel being a moving part and a potential hazard. If you know different, please let me know by commenting below.

IMG_6332 (Medium)

The reverse of the flywheel, with red paint still visible

The outer edge of the flywheel was left unpainted and I think that I will just clean it up and leave it the same. I was debating whether to take the flywheel to a local engineering firm and have them turn the wheel on a lathe and machine the edge to give a neat finish. I’m not sure. I think I’ll attempt to clean it up manually with emery cloth or a flap disc in the grinder, before I make my mind up.

IMG_6329 (Medium)

Slight damage to the face of the flywheel

IMG_6333 (Medium)

Chemical metal (filler) applied to the damage

There was some slight damage to the flywheel face caused by me using the grinder to cut off the old pulley. I’ve just used some chemical metal filler (similar to car bodywork filler) to fill the marks and I’ll sand this down before applying paint.

One benefit of cleaning up the edge of the flywheel was that I was able to expose both the timing mark and the serial number, which are stamped into the surface.

IMG_6326 (Medium)

The timing mark….

IMG_6328 (Medium)

….and serial number

14/04/17. Happy Easter!

IMG_6299 (Medium)

Spring has sprung!

Well, here we are. It’s Good Friday again and one year on, the engine still is not finished but progress has been made.

This time last year I was grinding the valves in the cylinder head which still only bore a coat of red oxide primer. The valves are now in (with new springs), the cylinder head has been painted in Mid Brunswick Green and I’ve moved onto starting to put everything back together again.


IMG_6298 (Medium)

The timing gear casting and its associated governor components

Firstly the timing gear casting was fitted back to the crankcase. Notice the spanner I’ve left on the nut closest to the governor housing. This is always the last nut (when removing) and the first nut (when refitting) to tackle. Unfortunately I’d forgotten that, and did all the other nuts up before realising this!

If you offer up the casting to the studs and just slide them slightly on, you can then use a pair of long nose pliers to get this nut into position and get a couple of turns of it onto the stud. I should point out that there was also a paper gasket put into place before this was done.


IMG_6300 (Medium)

The crankcase cover

IMG_6301 (Medium)

Governor cover plate fitted

Next up was the crankcase cover was put back in place with a new gasket. Notice that a stud is missing. I have ordered a replacement and will fit this in due course. Finally the governor cover was bolted back on, including the push rod that the weights push out to slow the engine speed. I have left the magneto bracket for now, as I also need to source new bolts to secure the mag onto the bracket, and one of these needs to be fitted prior to attaching the bracket to the rest of the casting.

Next time I’ll be taking a look at the flywheel.


19/02/17. Piston Progress

I have spent a couple of hours today getting various parts back on the engine. Most importantly I’ve refitted the piston and crankshaft. I have also put on the oil filler and fitted the splashguard back in the sump. Prior to starting work I used a vacuum cleaner to remove all the loose pieces of metal and detritus that had accumulated in the bottom of the engine block since I first cleaned it out with paraffin, many moons ago!

img_6174-medium

The oil filler “K” fitted with a paper gasket

I had intended to use a piston ring compressor to drop the piston back down the bore, but as it turned out, I just squeezed the rings in gently whilst tapping the piston with a rubber mallet.

img_6178-medium

Dropping the piston down the bore

A paper gasket was put in place ready for the fitting of the crankshaft.

img_6177-medium

Crankshaft gasket

 This was also the time to fit the splashguard before fitting the crankshaft

img_6175-medium

Crankcase Splashguard

img_6179-medium

Starting to look like an engine again!

I also took this opportunity to fit both oil drain plugs and fill the crankcase with oil

img_6180-medium

Oil poured in through the open crankcase

img_6181-medium

Oil filler shown up to correct level


30/01/17. The magneto revisited & Shiny Nuts!

Today I had a quick look again at the magneto. Despite a fair amount of work to clean it up and replace various parts, it still doesn’t produce a spark. I took the sprocket off and spun the mag over with a cordless drill. When rotated at speed I get a tiny spark that jumps about 1/8″ gap. Hardly the healthy spark needed for ignition!

img_6162-medium

The non-sparking Lucas RS1 (Hovis) Magneto

I think further technical assistance will be required on the magneto front. Working examples do come up on eBay from time to time. Unfortunately, they don’t come cheap. Seeing as mine is more or less complete, has cleaned up ok, and is what actually came with the engine when I purchased it, I’d rather try and get this one going. Even if it does turn out to be expensive.


img_6164-medium

One of the brass cylinder head nuts, dirty and corroded.

As the engine had sat so long without me doing anything, it had a developed a thin film of rust on the cylinder head face and also inside the bore. I used some wet & dry to clean this off and then oiled the surfaces to protect it against going rusty again. I also decided that the three brass nuts which hold the cylinder head on inside the water hopper, could do with a good clean. I gave them a going over with a file and some emery cloth, so now they actually look like brass! I applied a smear of grease to the studs as well.


img_6171-medium

Shiny Nuts!


28/01/17. We have wheels

I know it’s a bit late, but Happy New Year! It has been quite a while since I posted anything on here, mainly due to other more pressing DIY projects, namely the dreaded decorating! Now those jobs are finished, hopefully I can get on with the process of reassembling the engine and finally finish the restoration. So firstly I needed to fit the crankcase to the trolley, so that I can start building it back up on the trolley, without then having to struggle to lift the engine with other parts attached.

img_6153-medium

The engine now mounted on the trolley

Meanwhile I have also purchased a couple of more things for the engine. Firstly and most importantly some good quality oil that is suitable for older engines. Secondly I decided to get a gloss lacquer to apply to the engine once all the work is complete. Hopefully it will give a good finish and help to protect the paint.

The oil is made by Morris Lubricants and the clear lacquer is from Paragon Paints. Both items I was able to purchase online from the ever helpful Stationary Engine Parts Ltd (www.stationaryengineparts.com)

img_6158-medium

The engine can now be pushed up a ramp into the shed


31/10/16. Piston Rings

Having fitted the new bushes to the connecting rod, it was time to put on the new piston rings. These are simple enough to slide over the piston crown and down into place. To make the job a little easier and to stop the rings from dropping into the wrong slot, I cut some strips of metal from an old aluminium drinks can to use as shims.

img_6145-medium

Four aluminium strips to aid the fitting of the piston rings

The benefit of using a drinks can is that you can cut the strips with a decent pair of scissors and they are thin enough to easily slide between the piston ring and the piston itself. The first ring to go on is the bottom one, which is the oil scraper ring.


img_6147-medium

The shims in place showing how the ring can be slid down the length of the piston without getting stuck in the wrong groove.

The process is repeated for the next three compression rings. The aluminium strips pull out easily once the ring is located over the correct groove. It is advisable to wear gloves as both the edges of the rings and the shims can be a bit sharp.


img_6148-medium

The four piston rings now fitted

29/10/16. Connecting rod bushes

Having gone to the trouble of removing the old bushes from the connecting rod, I then had to wait several weeks for replacement parts to arrive, due to them being out of stock. Today I was able to fit the new bushes. This was done by heating up the con-rod with a blowlamp to get the metal to expand. The new bushes themselves were put in the freezer for a few hours in an attempt to get them to contract and make the job of getting them in a bit easier.

img_6127-medium

Heating the con-rod with a propane torch

It’s then a case of quickly lining the new bush up with the holes in the con-rod and then using a flat piece of sheet steel quickly tapping the bushes in.

Once both bushes were in it was time to refit the piston and gudgeon pin. The small end bush required a little work with emery cloth to get the pin to fit.

img_6135-medium

Applying some grease to the gudgeon pin

img_6136-medium

Beginning to tap the pin through the piston and the connecting rod


Finally it was a case of refitting the circlips either side of the pin. The next job will be to fit the piston rings and then prepare the crankcase to fit the piston and crankshaft. I will also need to mount the crankcase on the trolley at this stage, because as I start to reassemble the engine, it will get too heavy to lift otherwise.

img_6140-medium

The reassembled piston and connecting rod